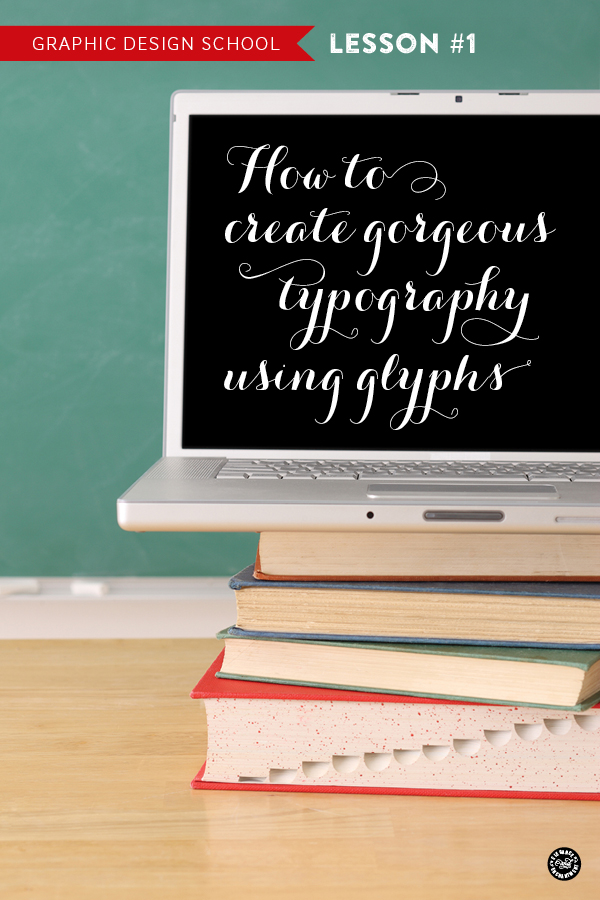
In this post, you’ll learn how to use font glyphs to make your designs look more dynamic and professional.
I’m so excited to be starting a new segment today: Design School! Don’t think of it as “school” in the sense that you need to show up on time and hand in your homework to me. My hope is that after reading through my tutorials, you will be “schooling” people, left and right, with your newfound skills. Before we dive in, just a little background on my credentials…
I did go to real design school and have my BFA in graphic design, but I hold no degrees or have any formal training in teaching— so please bear with me, and you actual teachers, feel free to chime in and share some pointers that will make my lessons better! You will hear/see me repeat this: There is more than one way to do things. I’ll just be sharing the methods that I personally use and have found to be the easiest and most efficient.
I don’t have a solid plan as to how often these tutorials will be shared, but I do have an arsenal of topics I’d like to cover, from everything to blog design to designing your own wedding invitations. If there’s something you would like to learn, and it has anything to do with graphic design, blogging design, printables, etc, please let me know, and I’ll add your topic to my growing list.
What will you need for this (and future) lessons?
– An open mind, excitement for design and the desire to bring your work to the next level.
– A computer. I’m guessing that if you are reading this you may have one.
– Adobe InDesign or Microsoft Word (for this lesson, I will be demoing in InDesign)
Adobe InDesign is what I use 85% of the time for my own projects. There’s a misconception that Photoshop is the best program out there for graphic design. Photoshop is intended to correct, enhance and manipulate photography, and that’s what I use it for. While Photoshop does allow you to add type on top of an image, it’s capabilities are limited. InDesign is a page layout program that allows you to use type and image together in a much easier, and more fluid way. If you have never used InDesign before, try it. I promise you will love it.
How to use font glyphs
With that intro out of the way, let’s move on to the first lesson (I feel like I ceremoniously need to put my glasses on and then push them down my nose a bit)…
What the heck is a glyph anyway? I picture cavemen drawings, which is close. The glyphs I’m talking about are the hidden gems of typography. With every font that you own, there is a secret set of characters that you may not have even know exist. I’m making this sound magical and ominous because it is. Let’s take a look at where these guys have been hiding out.
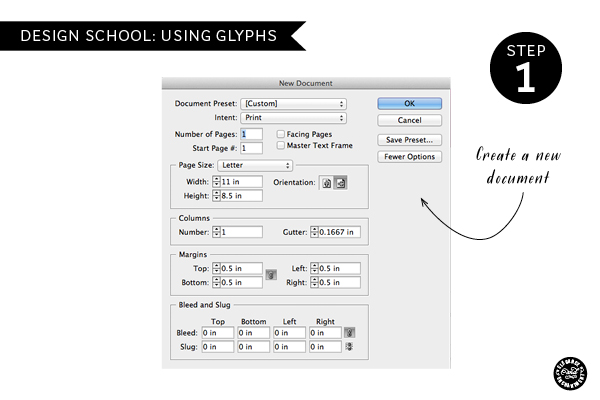
Step 1: Create a Document
To create a new document, go to File>New Document, and create a letter-sized, 8.5 x 11 document, horizontal orientation. You can uncheck the “facing pages” box, that is checked by default.
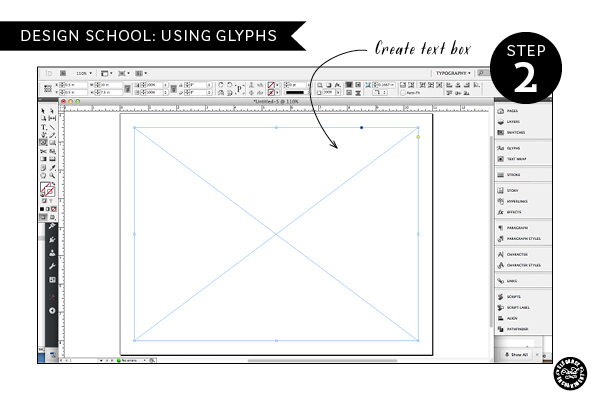
Step 2: Create a Text Box
To create a text box, select the text box tool from the toolbox and drag out a rectangle shape.
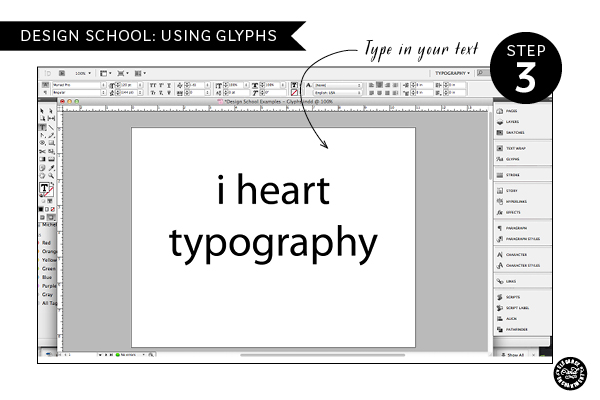
Step 3: Type in your text
Go back to the tool box and select the Text Tool (T) and then place your cursor into the rectangular box you just created. Type in the phrase of your choice. For this example I am using “i heart typography”.
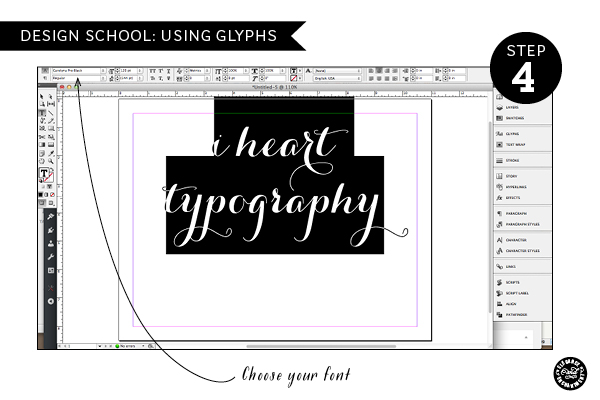
Step 4: Choose your typeface (aka font) and size
Highlight your text and go up to the font palette up top to select your font. You can also do this by going to your menu bar and selecting Type>Font. For this example, I’m using one of my favorites, and yours, Carolyna Pro Black. Make sure your type is still highlighted and then increase the size of the font, either by using the point size in the type palette, or under Type>Size (I made mine at 120pt). Lastly, center your type by going to Type>Paragraph> and then aligning center. Using your selection tool (black arrow in the toolbox), you can move your text box so that it’s centered on the page.
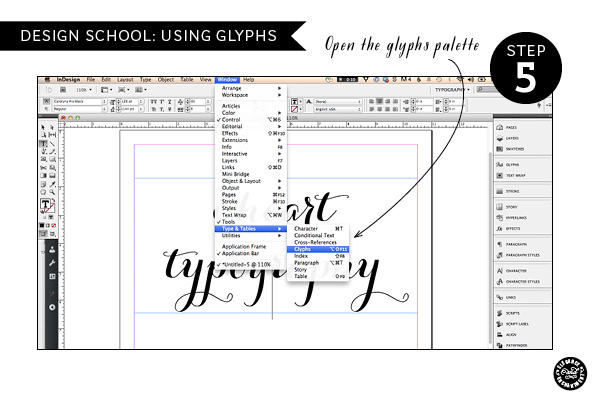
Step 5: Uncovering the Glyphs Palette
The big moment! Go to your menu bar and follow this path to open the glyphs palette: Window>Types and Tables>Glyphs. This is what brings your type from drab to fab. Let’s add a little zing to this type, shall we?
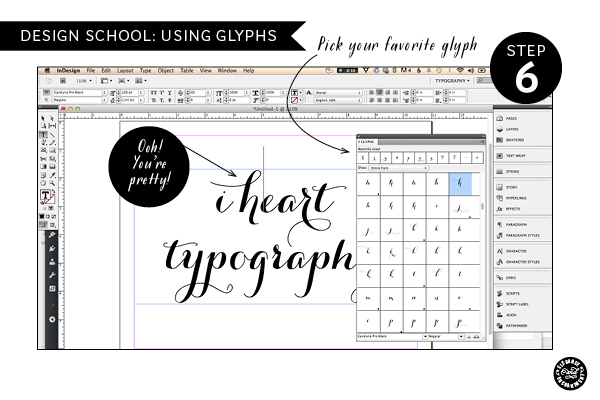
Step 6: Adding zing to your type
Start by highlighting the letter “h” in “heart”. If you look in your glyphs palette, you will now see not only the “h” character that is selected, but 7 different alternative “h’s”! I chose the fifth option for this example. Go through letter by letter and pick the character that you think fits your design best. It’s easy to get carried away, and want to make every letter fancy, but make sure that each selection is purposeful.
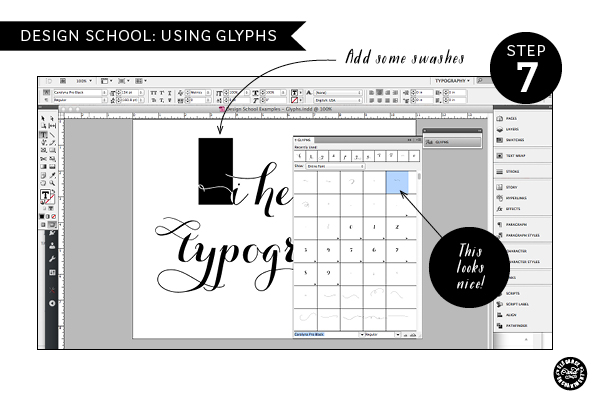
Step 7: Swashes and Swirls
In addition to the individual letter glyphs, there are also fonts that offer swashes and swirls that you can attach on to the ends of letters. Sometimes (like in this case), they are located before the numbers in the glyphs palette. For this example, I added this little swirl onto the “i”.
A note: There are some fonts that have way more glyphs than others, and if you’ve ever gone to buy a font, and noticed that there was a “pro” version and a regular version, here’s where you will see the difference. The pro version gives you more glyphs!
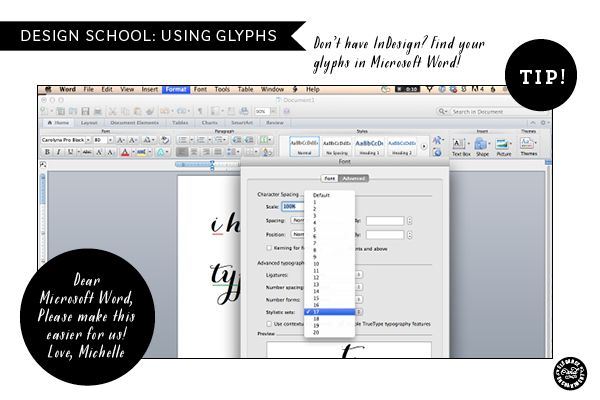
Another note: To my knowledge, as I’m writing this, you are not able to access these glyphs using Photoshop, Photobucket, or PicMonkey (if anyone knows otherwise, please let me know). There is a way to access them using Microsoft Word, under Format>Font. Click on the “Advanced” tab within the window, and select one of the “stylistic sets”. It’s not quite as user-friendly as using InDesign, but you can do it!
Here’s a comparison of the two font treatments, one using glyphs and one without:
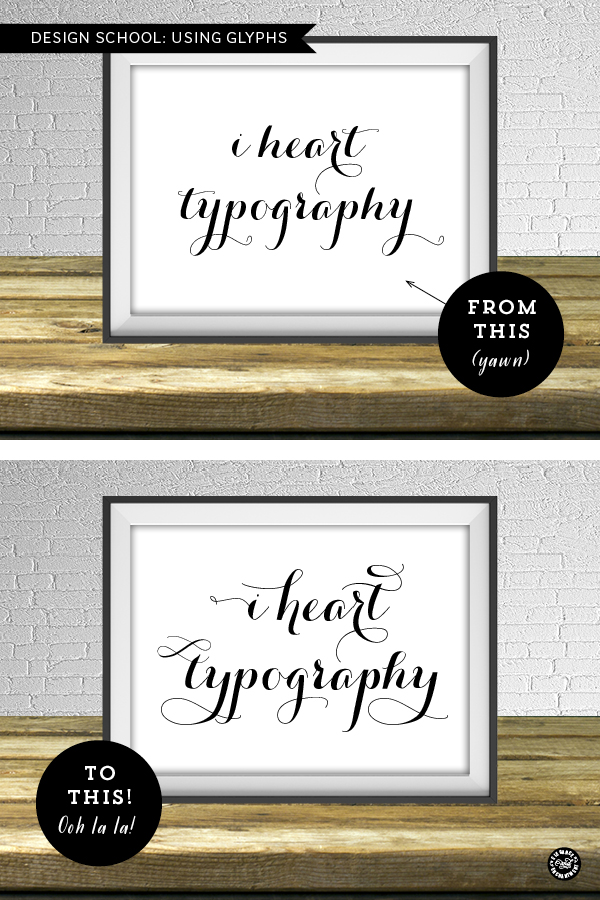
Pretty crazy, huh? I hope that you have enjoyed this first lesson and are ready to go out and create some beautiful type!
Font used in sample: Carolyna Pro Black
This post contains affiliate links.